|
| Hardware Parts Accessories |
|---|
| Electronics |
| Guitar Wood and Kits |
| Tools |
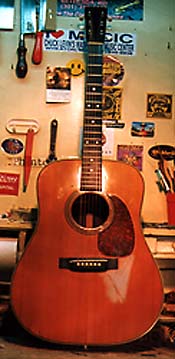
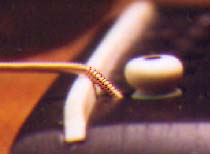
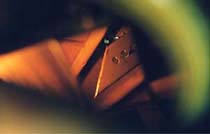
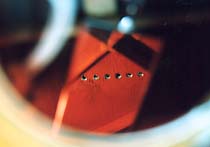
The new owner of this early '50's Martin D-28 wanted it put to rights. Over time ( and possibly due to a mis-aligned bridge re-glue) the string pin holes in the bridge plate (a patch of wood glued to the inside of the top under the bridge ) had become worn and expansive, allowing the string winding at the ball end to pull up into the saddle. This can cause buzzing and/or bad intonation ( or bad tone, or loss of volume) and reflects the wearing away of the wood ( "bridge plate" or "bridge pad") which re-enforces the inside of the top where the strings are seated in a "pin style" bridge. |
|||||
 |
|
||||
|---|---|---|---|---|---|
|
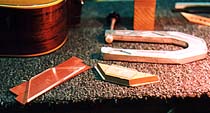
The remedy is to replace the bridge plate. Actually there are ways to add a patch or plug the holes, but we wanted to do the restorative method. In this case the original bridge had been replaced by a fairly good reproduction but it was lifting up and just didn't look good anyway, so the decision was made to replace it with a factory original. To my way of thinking , it is best to remove the bridge plate with the bridge in place. It adds strength to the top in the forceful process of removing the bridge plate. Here I am treading on delicate territory - Heating the bridge plate ( or the bridge for that matter) is considered to be the preferred method in some situations, but unless I am certain that "white glue" has been used I am just as happy to go in with a warm artists pallette knife ( ground very thin and small). Working in from the bass side corner I try to let the knife "feel" its way in between the glue line. On a big guitar like this I can get arm inside without too much distress and slowly work the knife around. Actually I have three knives that I use. I get one in and let the others warm up on the heating element. The one in place helps keep the gap separated while I slide the next one in. |
|||||
 |
|
||||
|
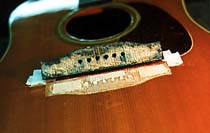
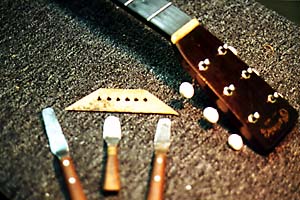
The whole process probably took over the course of a couple hours with a number of breaks to massage my arm, examine the progress with a mirror, wonder if I was going to get the thing out cleanly, and reflect back on the one top replacement I did on a Martin D-35 because another repairman had gone right through the top , trying to remove the bridge plate . In the end it came out very cleanly. A testament to patience, and using the right tools for the job. |
|||||
 |
|
||||
|
|||||
|
When top wood is lost it is always advisable to replace it . In this case I etched out the edges of the areas where wood was lost into rectangles and then fashioned rectangular spruce patches to fit the spots. Each patch was clamped in place while it dried and then sanded level to the top. I also filled the old string holes with spruce plugs. |
|||||
 |

|
||||
|
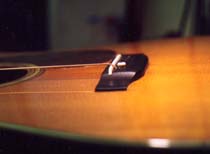
A replacement bridge from the Martin factory was final shaped and fitted, and then glued in place.
My preference for glue on parts such as this is either white or hide, because each afford ease in splitting the glue joint down the line. In this case hide glue was used on the bridge and plate. The clamping setup involved a nicely shaped wood caul on the inside and a similar plexiglass caul with sturdy rubber padding to protect the finish on the outside. With Martin guitars the top in this area is relatively flat. In some cases ,over time, the top may bulge up. If the bulging has occurred with all the normal reenforcing parts intact I don't necessarily try to eliminate the bulge. If the bulging has occurred due to loose bracing, bridge, or bridgeplate, I don't think twice about going for a relatively flat clamping situation. On Gibson "flattops" there tends to be more of an arch built in. In these cases a clamping set up which accommodates that arch is correct. |
|||||
 |

|
||||
With the bridge back in place this old D-28 sounds great , looks great (inside and out) , and is ready for another five decades of music.
|
|
||||

 Once the bridge plate was out I removed the bridge. This bridge had been off before and re-glued
in a less than clean fashion with my least favorite bridge re-glue adhesive - Titebond. Titebond, or alphatic
resin glue is very strong and good for many repairs but not for pieces that you may want to cleanly remove
in the future. As the advertising says - the glue joint is stronger than the surrounding wood. In other words
, when you try to separate this glue joint you are likely to tear out surrounding wood. Well, there was some
tearing of wood , and gnashing of teeth.
Once the bridge plate was out I removed the bridge. This bridge had been off before and re-glued
in a less than clean fashion with my least favorite bridge re-glue adhesive - Titebond. Titebond, or alphatic
resin glue is very strong and good for many repairs but not for pieces that you may want to cleanly remove
in the future. As the advertising says - the glue joint is stronger than the surrounding wood. In other words
, when you try to separate this glue joint you are likely to tear out surrounding wood. Well, there was some
tearing of wood , and gnashing of teeth.
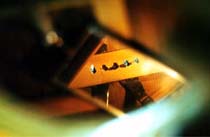
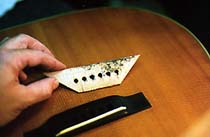
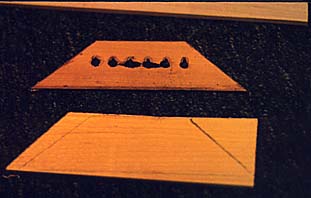 A likely piece of hard maple stock was thinned down to .101ths of an inch ( Martin specs) and then, using
the old part as a template, cut to the original shape. The final fitting is done by inserting the plate without
glue , clamping it in place and viewing it through an inspection mirror making adjustments as necessary
until the correct fit is achieved.
A likely piece of hard maple stock was thinned down to .101ths of an inch ( Martin specs) and then, using
the old part as a template, cut to the original shape. The final fitting is done by inserting the plate without
glue , clamping it in place and viewing it through an inspection mirror making adjustments as necessary
until the correct fit is achieved.