|
| Hardware Parts Accessories |
|---|
| Electronics |
| Guitar Wood and Kits |
| Tools |
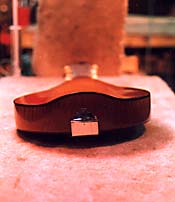
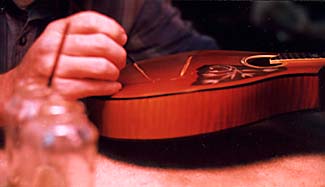
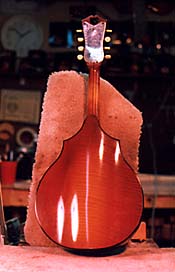
For a time the Vega Musical Instrument Company made a mandolin with a radical arch running lengthwise down the back. They were only made for a few years so you don't see many, but they sound fine. I can't speak to their design and production history but I have repaired a few.
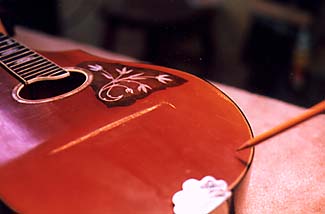
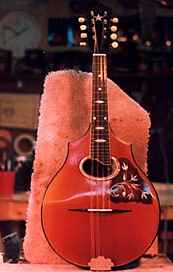
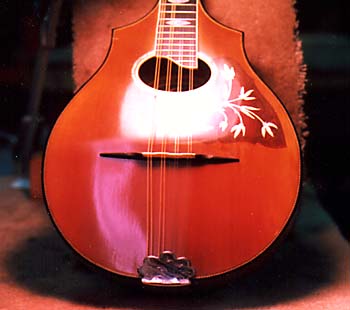
The radical carved (!) arch of the back is reinforced by braces carved to match their respective location inside the back. When these braces become loose they can be very difficult to re-seat cleanly for re-gluing. In one case I removed the back to re- glue the braces and do some crack repair. That was a trick ! This particular job was not that intense , but it was a challenge. The top had a crack that ran with the grain from the butt end to the bridge area where there was a little shatter and a then the crack dog-legged over and up to the inlaid pickguard.
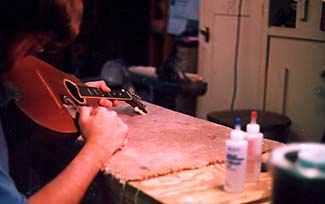
One of the difficulties in any small instrument is accessibility. I can get my arm up to my elbow into a Martin D-28, but I can only get a few fingers inside most mandolins. This makes repairs inside the instrument a real challenge. Violins are made with a mind towards future repairs. The glue joints to the top , back, and sides are accessible to a thin knife which facilitates removal. Hide glue, which is very strong, but both brittle and water soluble, is the traditional glue used in Violin construction. The top of a violin may be removed a number of times during its life to provide access for repairs. Most mandolins (and guitars) are not this friendly to top and back removal. Plastic or wood binding generally covers the top, back and side seams, and modern glues often create joints that are stronger than the surrounding wood. This was a borderline case. Such a long crack could be difficult to close evenly without good access to the inside. The rest of the instrument was in quite nice condition and it would be a shame to have a mis-aligned crack. But the removal of the back is costly operation, and even when done cleanly is usually detectable for one reason or another. Additionally the least intrusive repair method which provides good results is always the best. The customer in this case resolved this techno-philisophical quandry for me by declining to pay for a back removal.
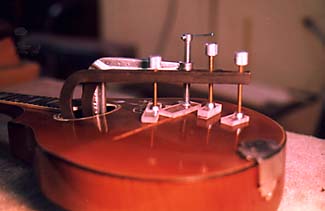
This turned out to be fine . After a few dry runs with various clamps, I came up with a configuration in which I closed the crack for its entire length. In addition, an interior top brace, more or less under the bridge location ,was also re-glued.
Once a crack has been closed it is often reinforced with small (varying in size depending on the thickness of the wood to be reinforced) patches of wood we call cleats Getting cleats positioned correctly inside an instrument can be a real trick. After shaping the cleats (an art in itself for those who care to take the time) they are inserted using a length of coathanger with a sharp point while viewing the interior of the instrument through a small mirror. Good eye to hand coordination is helpful here since everything is seen backwards. You have to move the reverse direction of everything you are looking at to get the cleat where you want it ! After the gluing the crack was nicely closed, although there were a few spots near the bridge end where flakes of brownish finish and wood where missing. Missing wood is the bane of the repairman. Many a decent luthier has been humbled by the challenge of replicating missing wood. The ideal solution is the perfectly grain-matched fitted wood patch. But the reality is that in many cases the goal is not attained. In this case the chips were small, though not cosmetically insignificant. In the area above the bridge the chips were not big enough to patch or fill. They would have laquer touched over them and in the end not be wildly distracting . ( I have found that over time many laquer touch ups are far less distracting than they initially appeared ) But dropping below the treble end of the bridge was an annoying tear drop shaped chip that was deep enough to warrant patching. Although a wood patch was theoretically possible, my experience has been
for
small chips of this kind ( particularly when the missing laquer was
tinted) can
be best filled with colored quick drying epoxy, If done carefully a very
pleasing result can be had. This top had a light brown shading .
Ideally, the
epoxy fill will be tinted to match the underlying wood and then the
shaded
laquer applied on top. The epoxy was mixed with pigments to match the
spruce top
as closely as possible . When the fill had dried it was carefully
scraped level,
and then just below level to "feather' in the laquer to the ajoining
areas with
a sharp knife.
Then clear laquer is touched into the entire crack. The laquer is built up over a couple of days a layer at a time .as Nitrocellulose laquer is highly evaporative. Doing good touch up work can drive you nuts, but when it comes out nice it seems worth the all the attention to detail. Eventually the dried laquer is sanded level and polished . Finish touch up is probably one of the most painstakingly difficult aspects of fretted instrument repair. Good work can take a long time, and not just because of the care involved Traditional finishes such as shellac and nitrocellulose laquers are highly evaporative and continue to shrink for years ( which is one reason you see such thin finishes on many older instruments). The thin line of laquer you apply this morning will virtually disappear by this afternoon so it must be built up over a period days. And color matching is an art unto itself. In the ideal scenario time is not a factor where laquer touch up is involved.
Clear laquer is touched into the entire crack. The colored laquer on either side blend in a little with the new clear. A brown tinted laquer is applied over the larger chipped areas, and then clear on top. The laquer is built up over a couple of days, a layer at a time . Doing good touch up work can drive you nuts, but when it comes out nice it seems worth the all the attention to detail. Eventually the dried laquer is sanded level and polished . In the end , the chipped out areas on the Vega were not invisible but the crack nearly was. Best of all, it sounded real nice ! Steve Carmody repairs and builds fretted intstruments at his shop in Silver Spring, Md. |
||||
| ||||