|
| Repair Articles |
|---|
| Ask The Repairman |
| Repair Blue Book |
| Hardware Parts Accessories |
| Electronics |
| Guitar Wood and Kits |
| Tools |
| Friends |
|
|
|
|
|
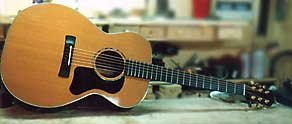
Headstock Crack Repair - Backstrap MethodBy Steve Carmody c. 2015Recently, a customer brought me a Gibson vintage reissue J-45 with a nasty headstock crack. Many Gibson necks are very slim in the area of the nut. Additionally, the truss rod nut access is at the base of the face of the headstock, directly behind the nut and the wood is scooped out in this area. As a result, the wood in this part of neck is quite susceptible to cracking if the headstock is bumped hard enough. The key indicator of potential long-term success when repairing a damaged headstock is a having a nice long gluing surface. So, from the repair point of view, the ideal crack runs from behind the first fret and radiates up to area of the E string tuning machines. With two long flaps of wood you can have a stable, strong glue joint. Indeed, some guitar necks are constructed from gluing together multiple pieces of wood and the headstock is fashioned by joining together two pieces of wood in what is called a scarf joint, which features a long flat gluing surface between the two parts. The worst case scenario from the repair point of view, is when the neck just snaps and the two parts just butt together. That is what had happened to the guitar that had been brought in to me. In a case like this one, if you simply butt the two pieces of wood together and glue them, the joint will never hold against the tension of 6 guitar strings. But if the guitar is worth the effort it takes, there is a method of successfully repairing a nasty crack such as this.
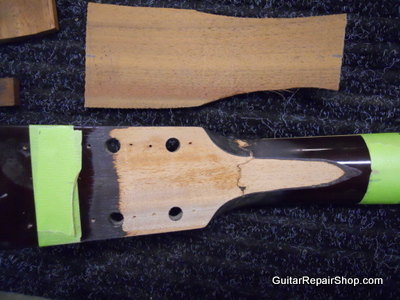
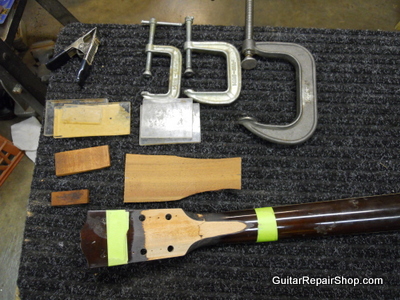
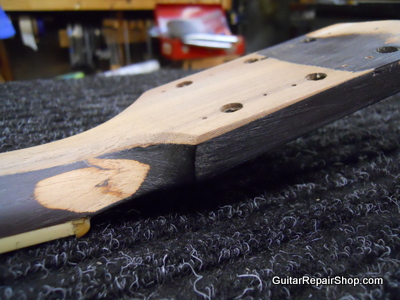
In the picture below you can see the crack. I have done the initial gluing but you can see that the neck essentially snapped directly behind the area of the nut and the two parts just butt together. As it is, there is very little strength in this glue joint. To renew the strength in this area I will fit and install an overlay of wood ( mahogany in this case, the same wood as is used in the rest of the neck) which will overlap the crack. This is called a headstock backstrap. Some luthiers use a backstrap, or a multilayered series of backstraps, to add strength to newly constructed necks. But in this case the backstrap will serve to renew the strength of the broken neck. With my freestanding beltsander, I sanded off about one-eighth inch from the neck and back of the headstock area. I tapered the sanded area at either end and it is deepest ( about an eighth of an inch) right where the crack is. The green tape gave me a general guide of how far in either direction I wanted to sand. Next I cut and sanded a piece of mahogany to match the curvature of the back of neck in the area where I sanded. This was done by eye, with repeated checks of the fit to the neck, on the belt sander. Some luthiers will take a pre-thicknessed veneer of wood and bend it to fit, but I decided to fit a solid piece of wood to the neck. Regardless of how it is fabricated, this additional piece of wood is going to add strength to this part of the neck. Once the curvature of the backstrap patch was fitted to the sanded area of the neck, I reduced the outer size of the patch until it was just slightly larger than the sanded area on the back of the neck. The picture below shows the various clamps and cauls used to glue the backstrap to the neck.
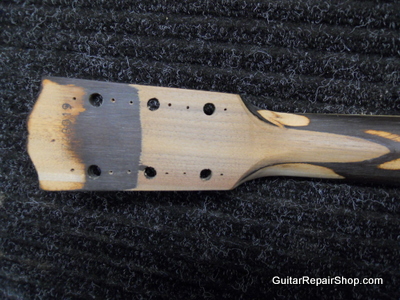
Once the backstrap was glued on, the excess wood was brought down to match the shape of the neck and headstock with a coarse rasp, files and finally sandpaper. In the pictures below you can see that the backstrap has been glued and fitted. Note that the strap extends a few inches above and below the area of the crack.
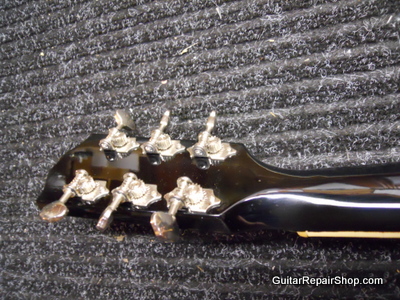
Then the grain is filled and sanded smooth. Multiple coats of sanding sealer, tobacco brown colored laquer and then top coats of clear laquer are sprayed. After the finish has cured for a couple weeks, it is polished out and the tuners installed. In the end, thanks to the fact that the neck is very dark tobacco brown, the repair is invisible.
Steve Carmody is an independant guitar repairman and luthier with a shop in Silver Spring, Md. He has been doing guitar repair and restoration full-time since 1990. Questions about this article or anything else related to guitar repair? Send e-mail to - GuitarRepairShop@aol.com |